
This section covers spatialization buses in Holophonix. For a good understanding of the terminology used, it is recommended to complete the course on spatialization algorithms before proceeding.
In the previous section, we worked with sources and inputs; now we will route a source to a bus.
Open the routing panel from the dock and select the Bus tab.
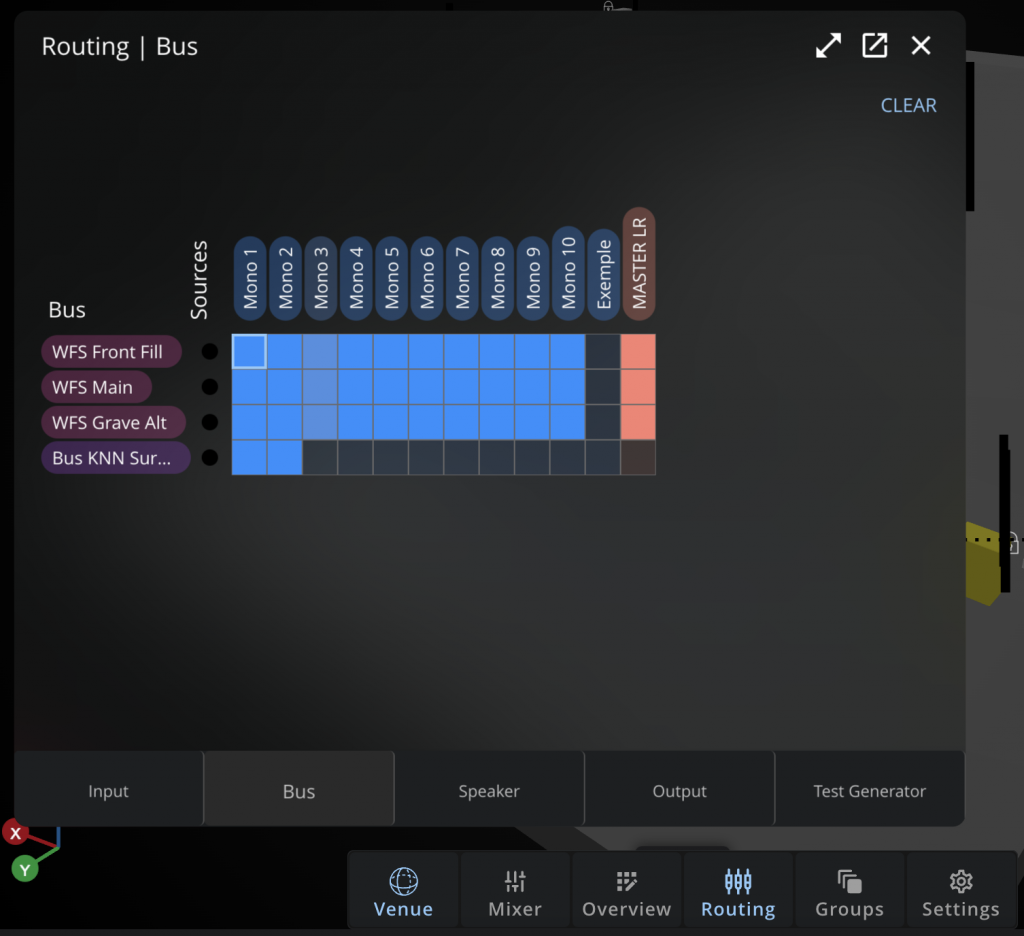
We can see 4 buses currently present in the project.
- WFS Front fill: A WFS bus assigned to the low array called “front fill”, intended to place sources in the array at the bottom of the stage in order to provide good spatial perception for the front rows of the venue (1st third).
- WFS Main: A WFS bus assigned to the high array, intended to ensure good spatial positioning perception for the last two thirds of the venue while providing adequate level to the back row.
- WFS Grave Alt: A low-frequency WFS bus assigned to the bass loudspeakers in the high array (4x Amadeus C 12 B).
- KNN Surround: A KNN bus allowing sources positioned outside the stage to be played through the surround loudspeakers (side and rear).
In the current bus assignment, we can see that the 10 initial sources are placed in the 3 WFS buses, with sources Mono 1 and 2 also assigned to the KNN bus.
As a result, these sources can be used to create lateral and rear effects.
We will assign our additional source to the 3 WFS buses (as is the case for the “Mono 10” source, for example) by clicking in the corresponding cells.
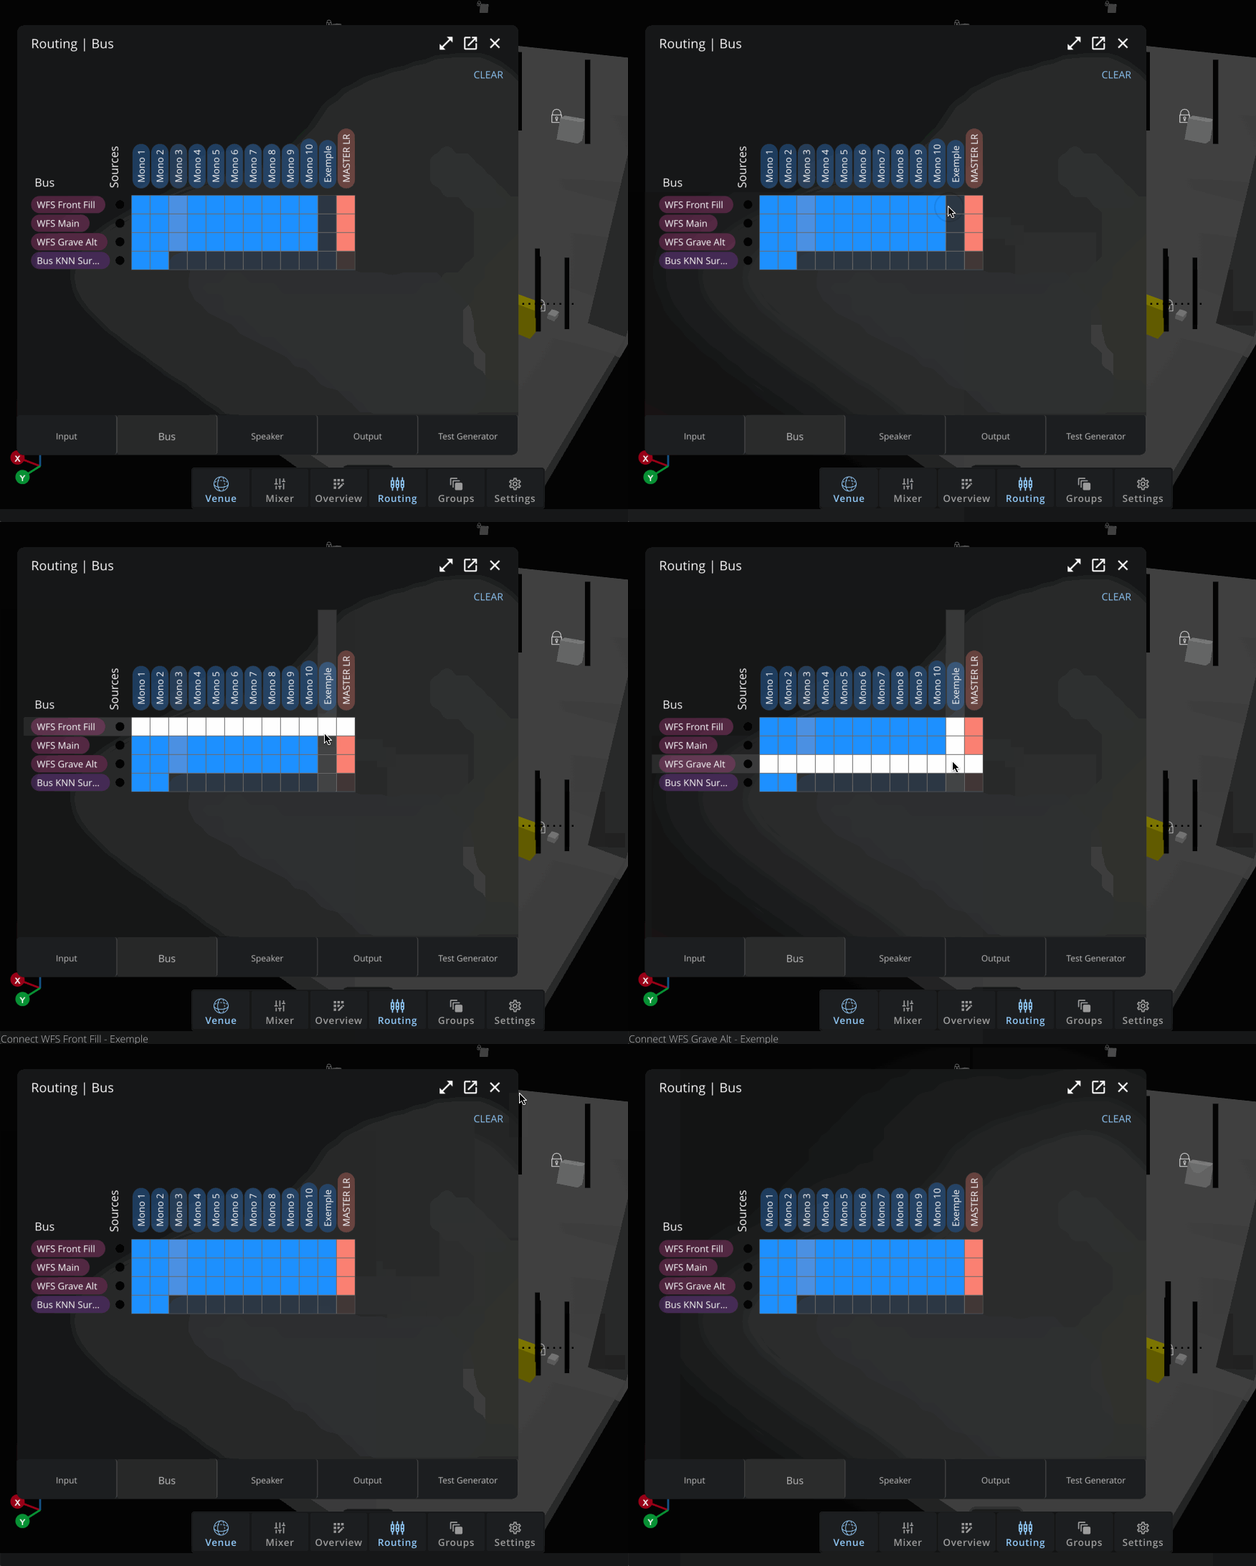
Our new source can now represent a new person or a new instrument on stage.
Creating a Bus
Just as we created a source in the previous step, it is possible to create a new bus, either via the menu Add > Add bus or via a right-click then Add > Add bus.
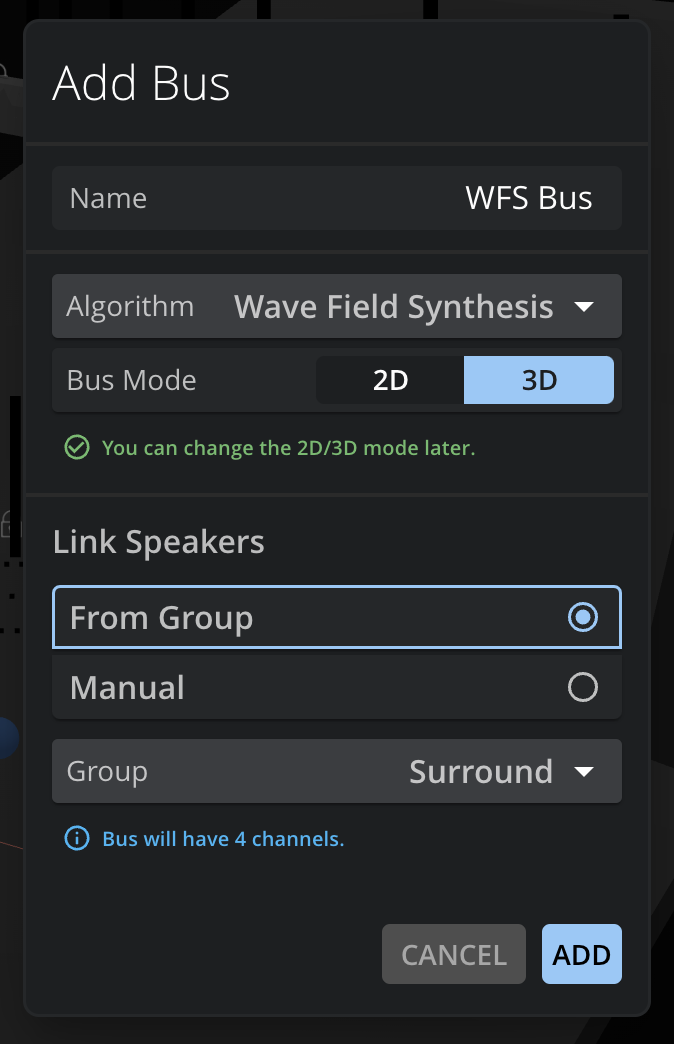
One of the distinctive features of Holophonix is that a wide range of spatialization algorithms are available.
The 3 main families are as follows:
- WFS (Wave field synthesis) 2D/3D
- Ambisonics (HOA)
- Amplitude panning, which includes VBAP, VBIP, LBAP and KNN
Binaural and stereo buses are also available, but these will be covered in a future lesson.
A complete description of how each of these algorithms works is available as courses on this platform or in the Holophonix documentation.
Routing Buses to Loudspeakers
With our buses in place, we need to ensure they are correctly routed to the loudspeakers. To do this, still in the routing panel, go to the Speaker tab.
We can see in this matrix that the bus assignments presented above are correctly applied.
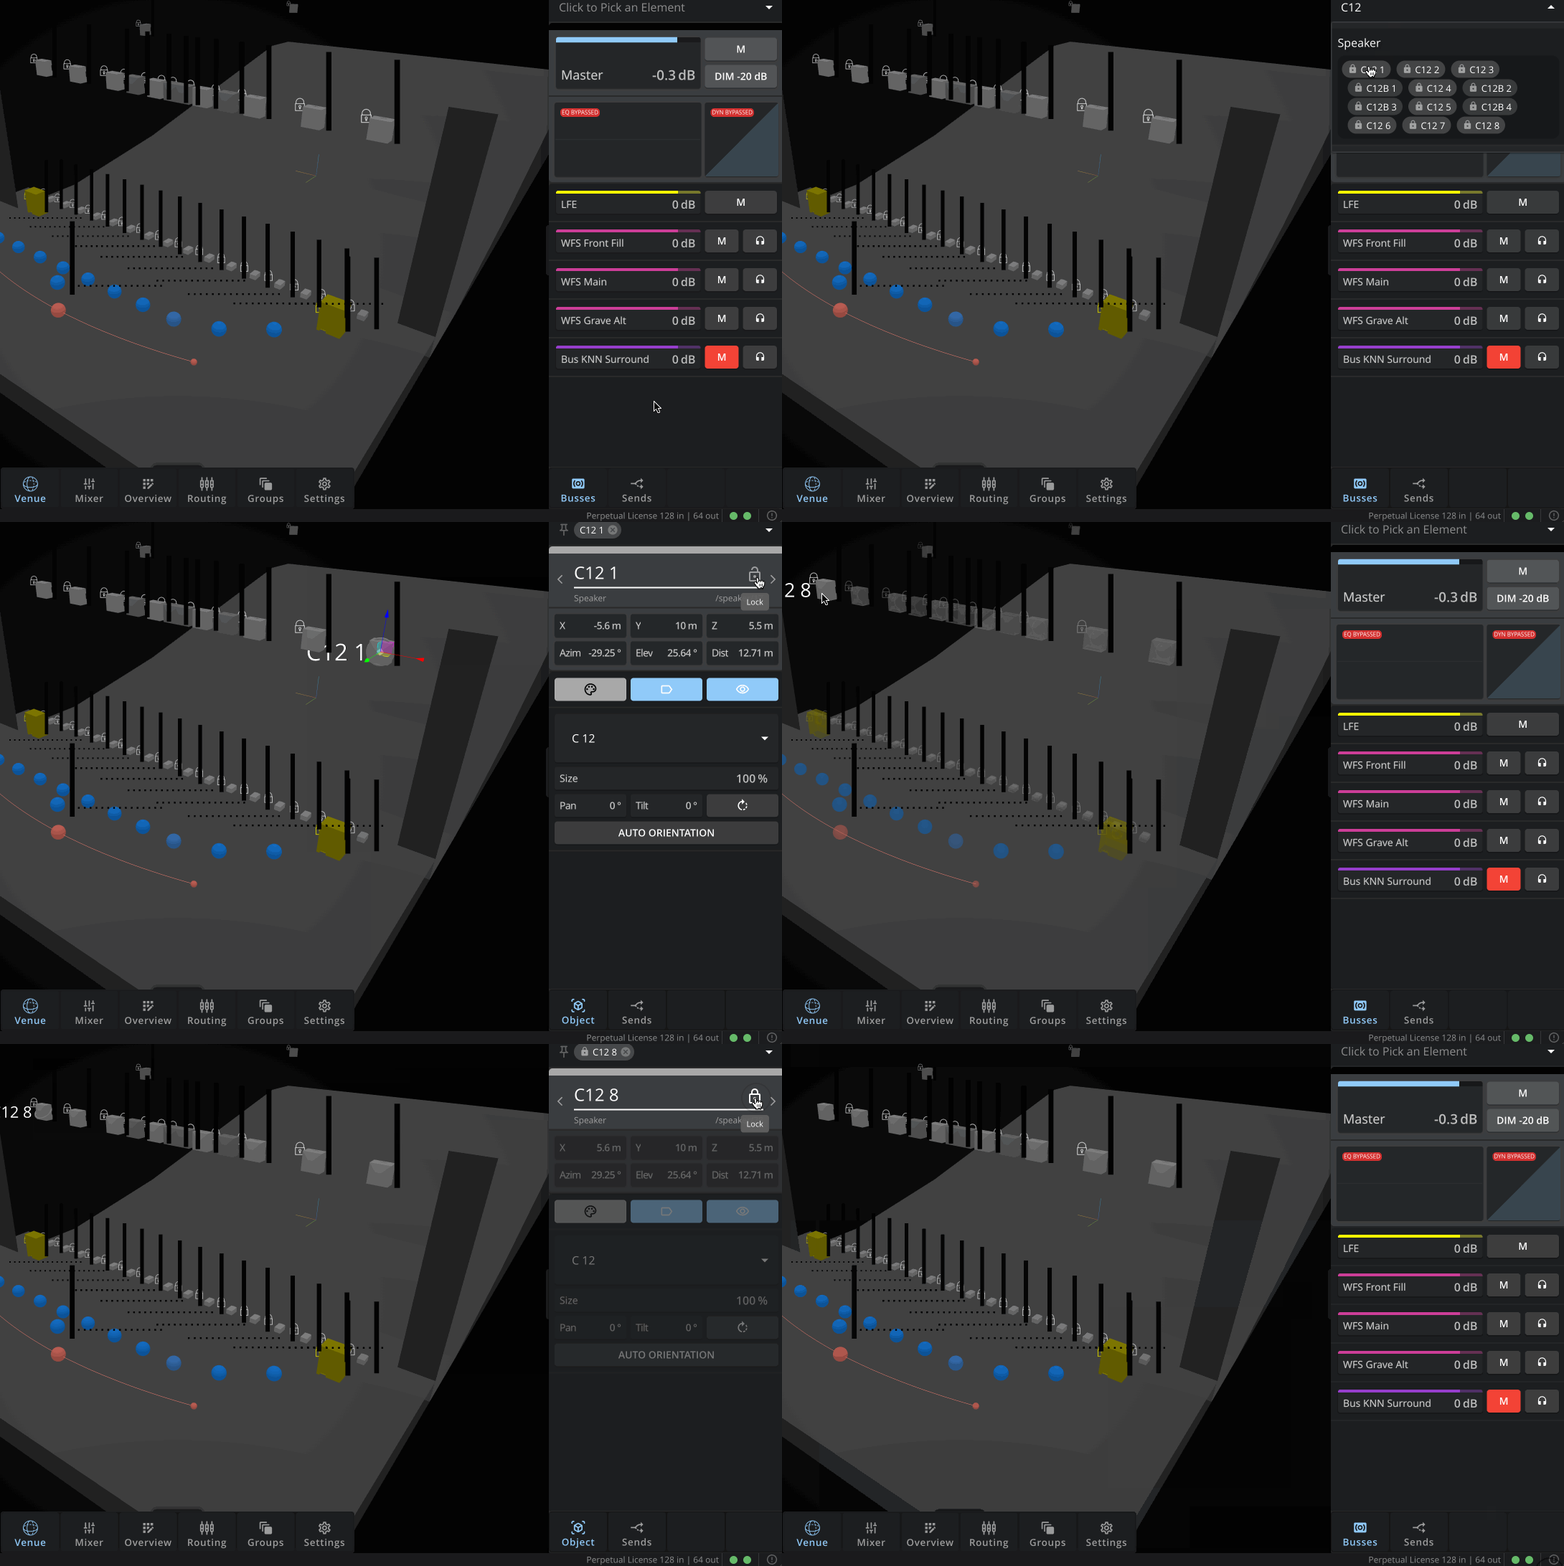
Locks appear to protect the position and assignment of loudspeakers from being moved to new buses.
To deactivate a lock, simply select the loudspeaker either from the 3D view or from the inspector’s search field, then click the lock icon appearing next to the loudspeaker name.
Direct to Master
You may have noticed that the two subwoofers placed on either side of the stage were not visible in the buses or in the routing.
As is often the case with subwoofers, they do not necessarily need to pass through a spatialization bus. However, they still need to pass through Holophonix in order to remain synchronized with the spatialized sources.
Referring to the previous illustration, we can see that the “Direct to master” signals bypass the bus assignment and go directly from an input to an output (routed via the input and output routing matrix).

In our project we can see in the input and output routing that we have a “DLive AUX SUB” input routed to a 2-channel “direct to master” named “Direct Subs”, which is routed at the output to our two ABB 12 subwoofers (stage left and stage right).
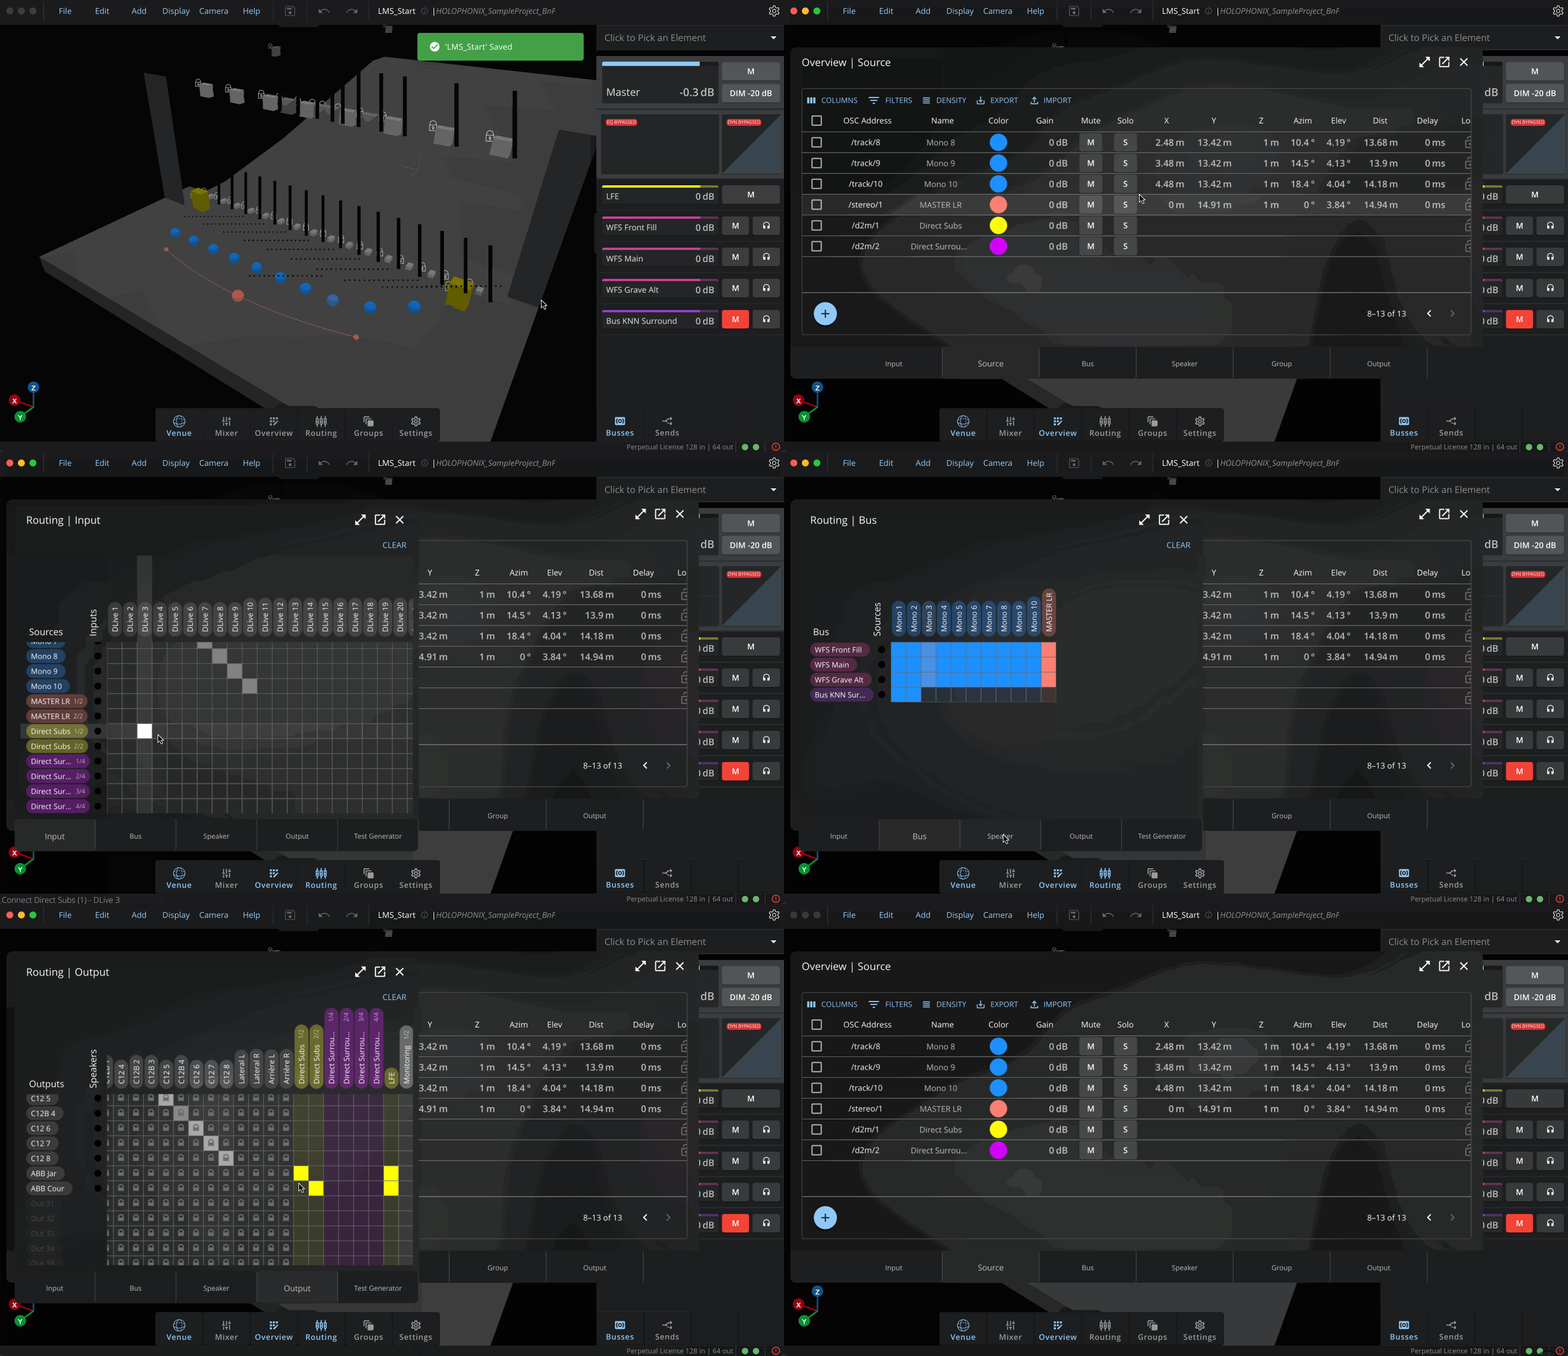
We can also note that the LFE channel is also routed to these two subwoofers.
The LFE channel collects low-frequency information from all buses and transmits it through the LFE channel, allowing precise management of infra-bass content depending on the material and the venue.