
This section applies to users of Holophonix Native and Holophonix Processors and cannot be replicated on Holophonix Designer.
It is nonetheless strongly recommended to read through this section even if you only have Designer, as this part is very important for setting up a Holophonix system in real-world conditions.
In order to visualize audio streams, listen to a headphone render, or monitor on loudspeakers, it is necessary to configure Holophonix correctly.
In the dock, click on Settings then Audio.
Then in the menu, select your input and output interface (these can of course be the same hardware).
In this example, I have selected a virtual interface (Blackhole) as input, and the headphone output of a MacBook as the output (2 channels). Select what is appropriate for your configuration.
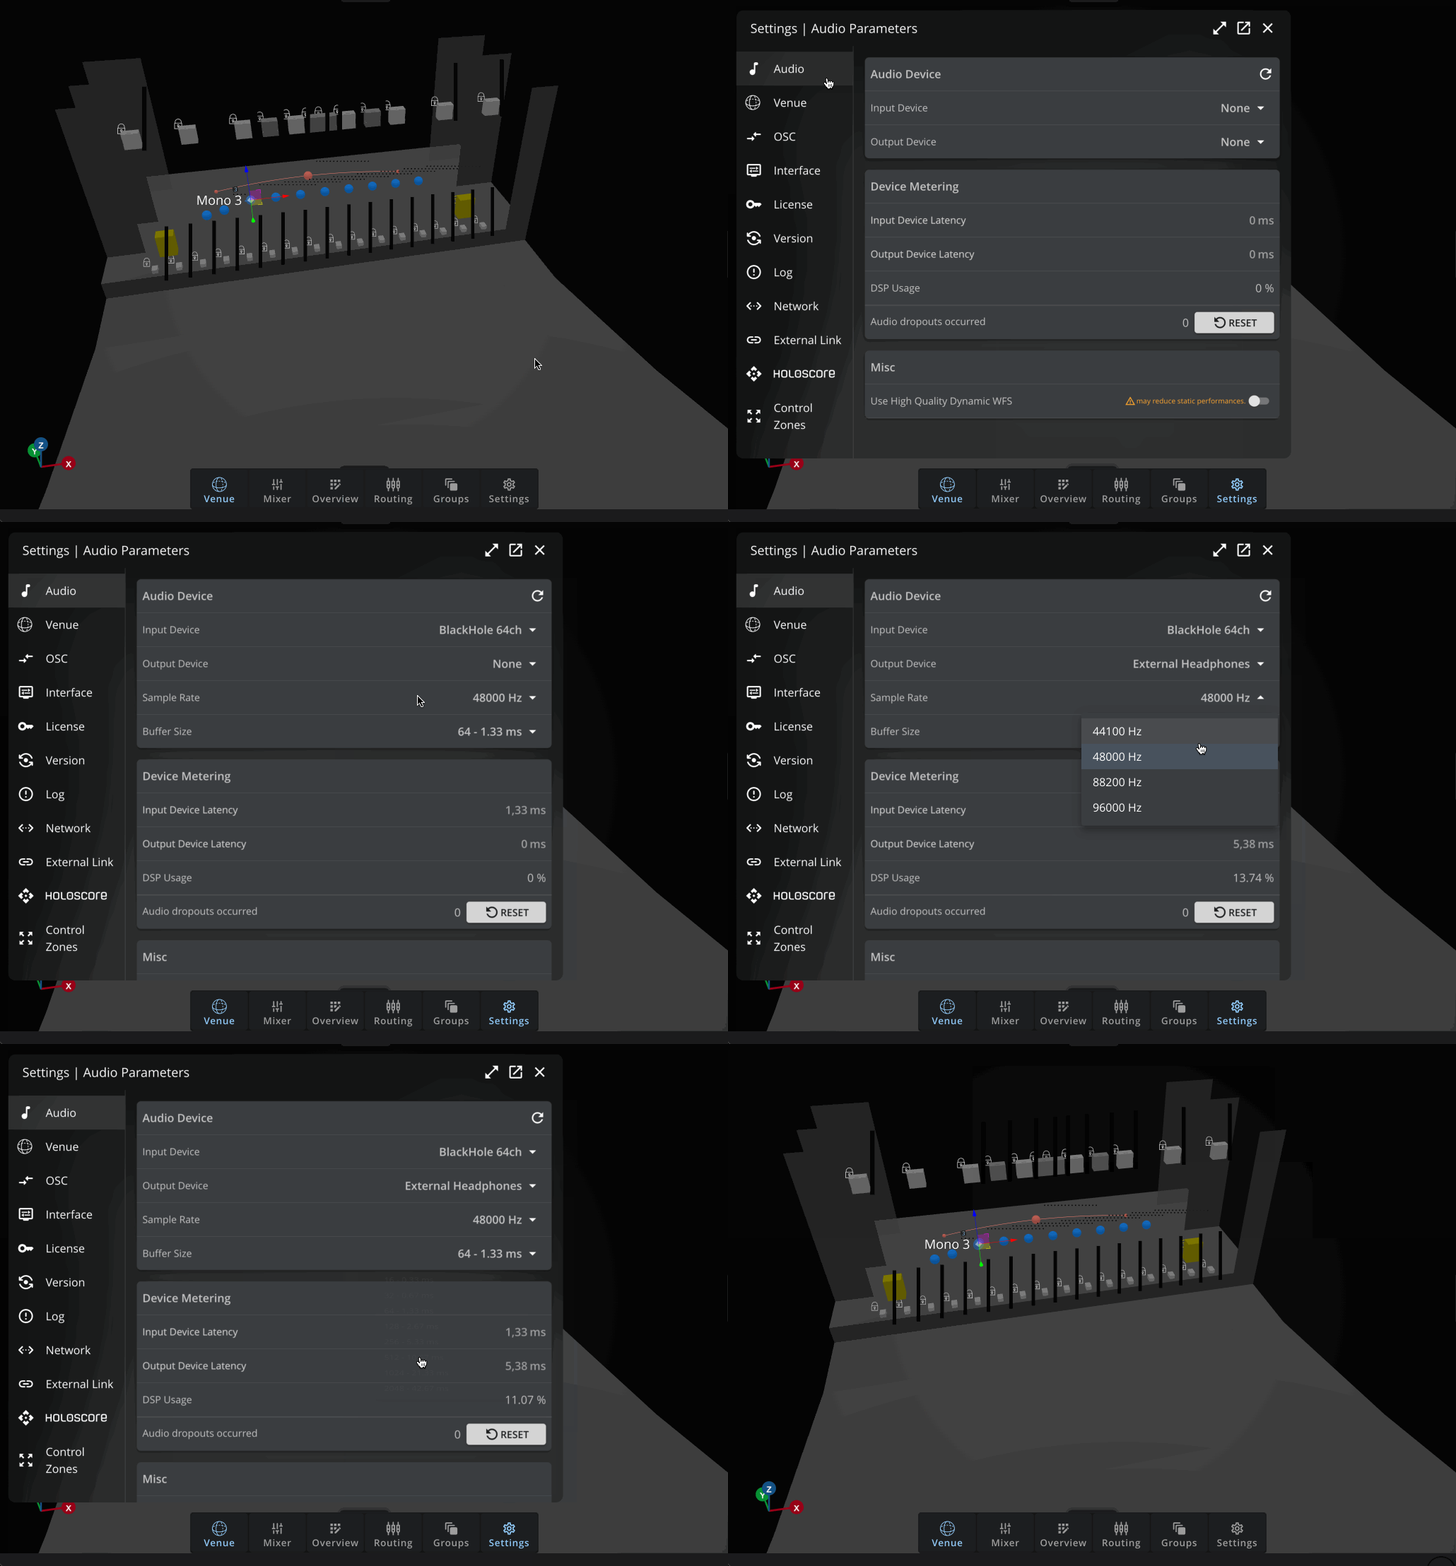
The sample rate and buffer size are available in this menu.
Depending on the complexity of your projects and the computing power of your Mac, you may need to increase or decrease the buffer size to achieve the best possible latency without experiencing dropouts.
Once the interface is configured, we can verify that the output routing is correct.
Using the Test Generator
To ensure that the routing and output assignments are correct, it is recommended to use the test generator.
To do so, in the dock click on Routing, then open the last tab Test Generator.
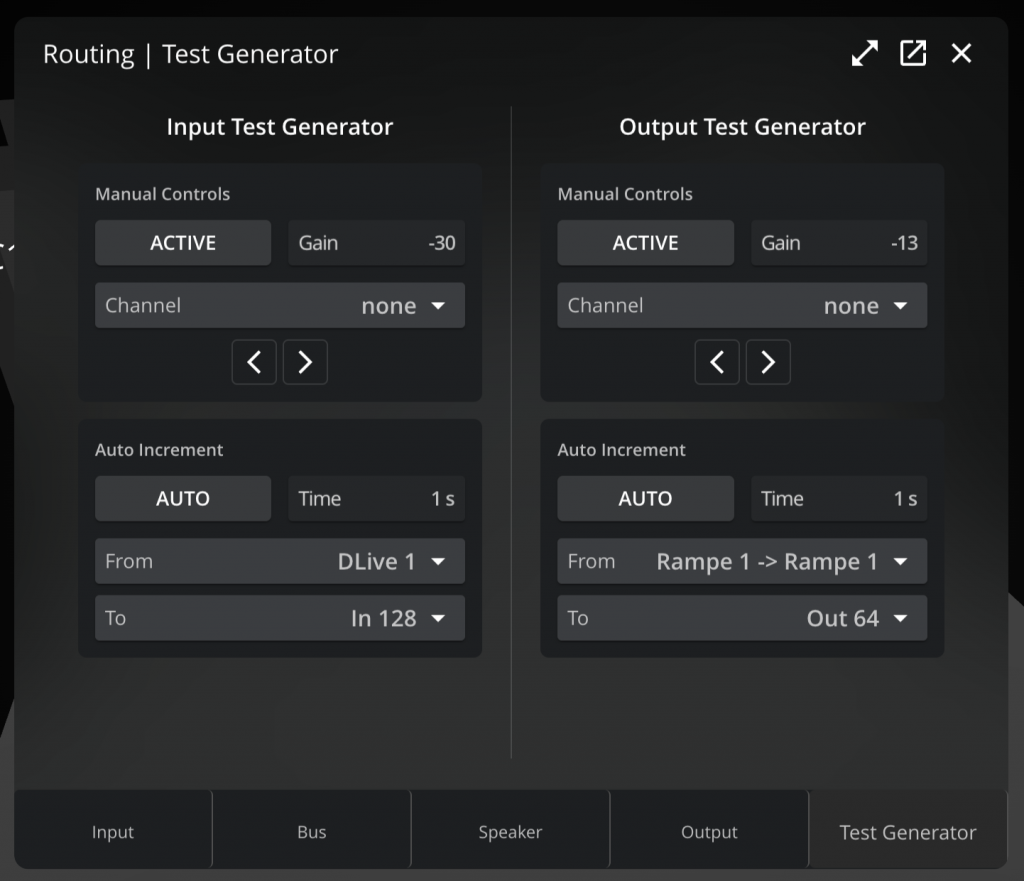
The panel is presented in 4 quadrants (2 columns and 2 rows).
- The first column manages the signal generator placed at the input of the signal chain (at the Holophonix inputs).
- The second column manages the signal generator placed at the output of the chain.
The input generator allows verification of correct routing from sources to buses and then to virtual loudspeakers, while the output generator allows verification that the Holophonix outputs correctly correspond to the physical loudspeakers in the venue.
Here, let us try to verify the correct operation of our WFS buses. Select the source “Mono 3” in the top-left quadrant, and by setting a low gain (for example -30 dB FS) we can click Active to verify that source 3 is correctly playing through the WFS array loudspeakers.
Once the generator is activated, move this source to verify that there is indeed an amplitude variation in each loudspeaker depending on the source position.
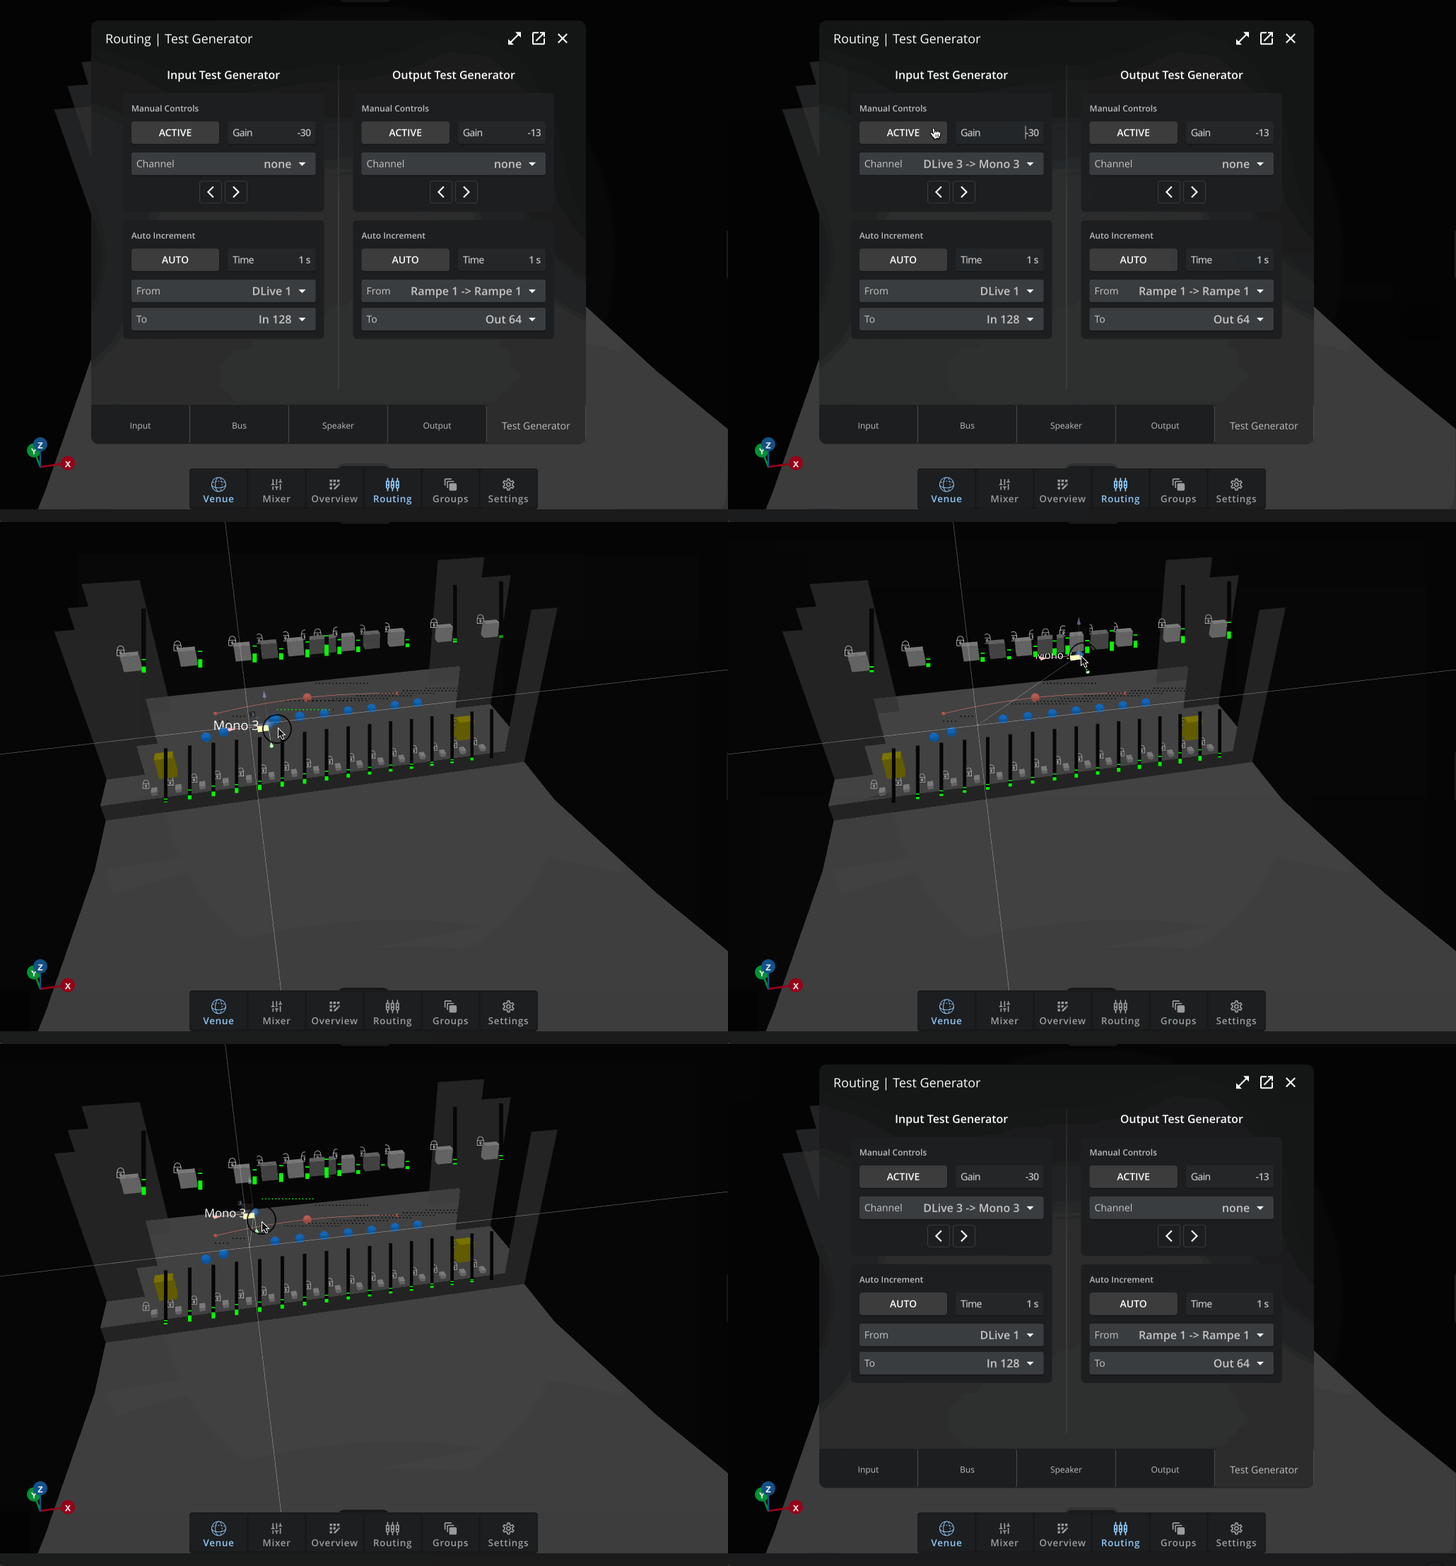
The lower section of the test generator allows automatic stepping from source (or output) “From” to source (or output) “To”. This can be convenient in the case of inputs to verify correct routing of all inputs, and also in the case of outputs to ensure that all outputs correctly correspond to their respective loudspeakers and that there are no inversions once in the venue.